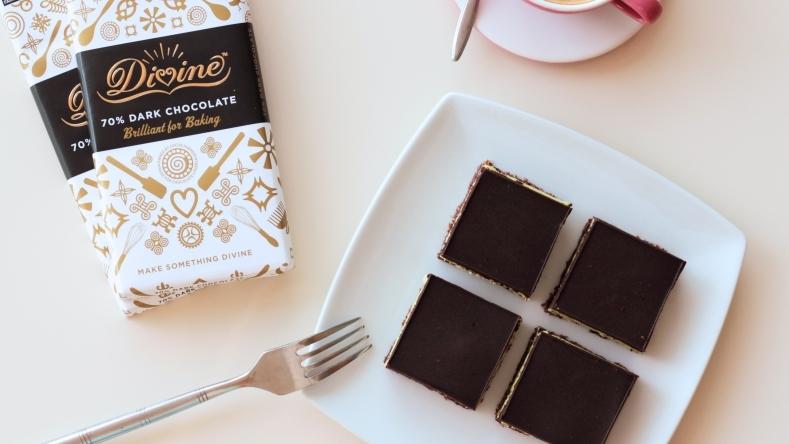
Although this recipe has a contested origin, it gained popularity on the west coast of Canada in Nanaimo, British Columbia. It starts with a delicious chewy base, is filled with a creamy mint centre and topped with the contrasting dark chocolate. Develop your chocolate tempering skills with this perfect ‘no-bake’ recipe.
By Erik Houlihan-Jong
Mint Chocolate Cream Bars
Prep Time: 20 minutes
Serves: People

Ingredients
130g unsalted butter, melted
60g Fairtrade caster sugar
1 large egg
1 tsp vanilla extract
6 tbsp Divine Cocoa Powder
300g plain digestive biscuits
100g desiccated coconut
50g chopped pecans
110g unsalted butter, softened
3 tbsp whole milk
1 tsp peppermint extract
2 tsp green liquid food colouring
4 tbsp custard powder
650g icing sugar
400g Divine 70% Dark Chocolate
20g butter
If you don’t have a thermometer, here’s an alternative method of tempering chocolate, or you can simply melt the chocolate and butter together until liquid and well combined, and then pick up the recipe at step 14. The chocolate will melt slightly at room temperature this way, so make sure you keep it chilled.
Method
Step 1
Prepare a sided 12" x 9" baking sheet with greaseproof paper and butter. I spread a bit of butter under the paper to help it stick down.
Step 2
Weigh out the butter, and melt in the microwave. It should take less than a minute and be a beautiful egg yolk yellow colour when it’s fully melted.
Step 3
In a large bowl mix together the sugar, cocoa powder, beaten egg, melted butter and vanilla extract.
Step 4
In a food processor make the digestive biscuits into a fine crumb. Then process the nuts into a fine chop, but not powdered.
Step 5
Add the coconut and pecans to the bowl, add the cocoa mixture too and then mix together with your hands.
Step 6
Press into the prepared baking sheet make sure to level it out as you go. Chill in the fridge.
Step 7
Moving on to the cream layer, soften the butter in the microwave, but don’t melt it. Combine with the custard powder, peppermint extract and green food colouring.
Step 8
Pre measure the icing sugar and place in a medium bowl. Slowly add the icing sugar alternating with the milk to reach the desired consistency.
Step 9
Spread over the base layer using an angled spatula, make sure it is evenly spread out. Clean up the edge of the sheet. Chill in the fridge.
Step 10
To make the chocolate top layer, we’ll temper the chocolate using the seeding method. It is important to have a minimum of 400g of chocolate when tempering, otherwise the temperature fluctuates too much. Chop up the chocolate separating it into two bowls, one with 300g and the other with 100g make sure the 100g is quite finely chopped.
Step 11
Melt 300g in the microwave in short 10-15 second bursts, taking it out and stirring each time.
Step 12
You can use a traditional kitchen thermometer, but a laser one is much easier and cleaner. Bring the 300g of chocolate up to 45°47°C and add the butter to the chocolate.
Step 13
Add in the final 100g of chocolate and continue stirring until it is all incorporated and melted. Keep stirring until the chocolate reaches a temperature of 31°32°C, at this point it is tempered.
Step 14
Working quickly, pour all of the chocolate over the layers and tilt the sheet to cover all the way to the sides. You don’t need to go right to the edge, as this will be cut off.
Step 15
Put the tray back into the fridge and let it set for 10-15 minutes. If it wasn’t August and warm out, it would set at room temperature, but you can help it along by using the fridge.
Step 16
Take it back out of the fridge and use a ruler to measure and score the chocolate. I make 24 bars that are 5 cm by 5 cm. If you don’t score the chocolate and let it set completely, you won’t be able to make clean cuts.
Step 17
Set in the fridge for 30 minutes. Remove from the fridge and use a knife to trim the four edges, before carefully transferring to a cutting board. This is where the greaseproof paper comes in handy!
Step 18
Cut them up and serve. As they are quite sweet, they go well with coffee!


